Wednesday, November 17, 2010

Doce de Marmelo (Marmelada)

DSC_0508

This months theme for the Can Jam of apples, pears or quince had me excited to try something that brings back so many childhood memories. One of my favorite snacks as child was a simple sandwich of toast with marmelada. Growing up in a Portuguese home we always had marmelada around. It never clicked with me until a few years ago that it was very similar to Membrillo or quince paste.

I was at a friends cottage this summer and he pointed out 2 Quince trees he had in his garden that were loaded with fruit. I knew that I wanted to try making my own "doce". I figured that if he was growing quince in his garden that it would be pretty easy to get some at one of our local markets. No so. I tried a few markets and when I was able to find some the price per fruit was just too high. I mentioned my search to a friend at a great neighborhood bakery that makes their own preserves, Flaky Tart and she offered to share some that she had picked at home. This made my day, I was finally going to try making my own childhood favorite.

I called my mom and asked her for her recipe and as her recipes go, it was very free formed. Some of this, a fingers worth of that. The recipe was very short on time and temperature details, so I really just used it as a guide and referred to a few books for similar takes on quince paste. The color. It never got to a golden orange-y stage but the flavor was as I remembered. I also think I left it on the heat to long and it set much harder than I expected.

Doce de Marmelo (Marmelada)
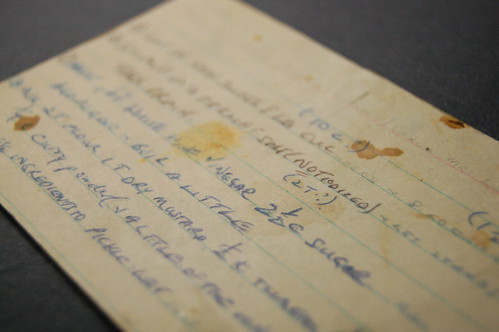
(translated directly from Mom's hand written note pictured)

Clean the quince well and dry. Peel, core and quarter. After, place in a pot and add water as high as the thickness of one finger, more or less (one finger sideways).

After it's cooked pass the fruit through a food mill. Add as much sugar as there is fruit and cook over a low heat and always stir so it doesn't burn on the bottom. When it's ready put it in jars.

Friday, October 22, 2010

Bunch o' Pepper Jelly


I thought this month’s Can-Jam theme was definitely going to be apples, so I was very surprised when peppers were announced!  I had already started planning to make an apple butter for the first time, which I’ll still have to try anyway.  One other thing I had yet to try and make was a jelly. All of the preserves I have made this year were either a pickle or a jam (one mustard though – does that count as a pickle?). 

I’ve incorporated peppers into many of my recipes this year.  I liked using their heat to add more dimension to some of my preserves, and loved the addition of chipotle to my BBQ sauce as well as ancho in my zucchini relish.  But this time I was struggling with peppers as the main ingredient.  I really wanted to try a jelly and searched around for different recipes to start as my base.  One thing I kept encountering in most recipes was the inclusion of pectin; I’ve really tried to avoid using it, and luckily haven’t had anything that relied on it so far this year.  So, I kept on searching and found that the answer to avoiding those packets of pectin lay in the ingredient I thought would be the theme – apples! 

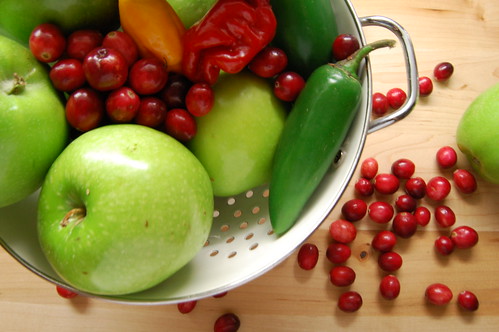
I found a recipe online at Simply Recipes that looked and provided an excellent base for me to work with for my pepper jelly.  The only problem that I ran into in following the portions listed was the thickness of the initial mash – I had to add 2 cups of water to make it loose enough to drip.  This is probably due to the different levels of pectin in different apples, and that I also added the whole bag of cranberries which basically doubled the amount (hey, I didn’t want them to go to waste!).  I also wanted to vary all the pepper flavors that I was working with, so instead of using only jalapenos, I added some habaneros and a poblano in place of the green bell pepper. You can vary the heat here by removing or adding the seeds in your peppers. I wanted to make sure my wife, not much of a chili head, would enjoy this so I left out quite a bit of the seeds.

*UPDATE* I really enjoyed the flavor of this jelly. There was a good mix of chili flavors and they were all present. I loved the addition of the cranberries to help with the appealing reddish jewel like coloring. As soon as everything cooled down enough we gobbled up a jar, spreading it on a fresh baguette with some fantastic triple cream Saint-Honoré. I would have liked things a bit hotter, next time I may leave in the habanero seeds as well.

Bunch o' Pepper Jelly
(adapted from Simply Recipes)

Ingredients:
4 pounds of Granny Smith apples - unpeeled, chopped and include cores
5 Jalapeno Peppers - 3 seeded and 2 with seeds included, chopped
2 Habanero Peppers - seeded and chopped
1 Poblano Pepper - seeded and chopped
8oz of Crannberries
5 cups of water
3 cups of white vinegar
3 1/2 cups of sugar (7/8 of a cup for each cup of juice)

This recipe yielded 5 - 250ml Jars

1 - Combine apples, including cores, peppers, cranberries, water and vinegar in a pot. Bring to a boil on high then reduce heat to medium-low to simmer for about 20 minutes. The apples, peppers and cranberries will soften. Stir occasionally to make sure nothing sticks or burns. Mash everything with a potato masher.

2 - Ladle everything into a sieve suspended over a large bowl. Allow it to sit for several hours (I let it go overnight). If the pulp is too thick and nothing is coming out you can add more water, you will want to end up with 4 cups of juice.

3 - Pour juice into a large pot and add the sugar (7/8 of a cup for each cup of juice). Heat gently and stir to make sure nothing sticks or burns.

4 - Bring to a boil. Cook for 10-15 minutes and skim off any scum. Start to test to see if the jelly is set on chilled plate (I put 2 plates in the freezer when I started to boil the juice). I also had a candy thermometer and pulled it when it hit 220f.

5 - Prepare jars and lids, ladle jelly into hot jars leaving 1/4 inch of head space and remove any air bubbles. Hot water process jars for 10 minutes.

Friday, September 17, 2010

Plum Jam with Bay & Vanilla

Plum Jam with Vanilla & Bay

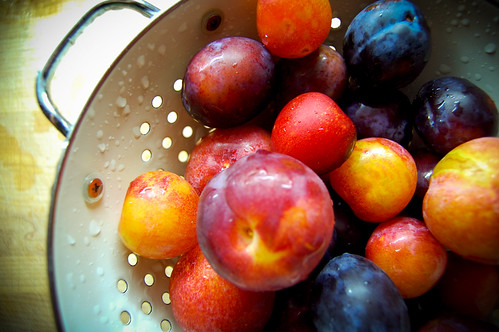
Such a crazy week and I'm leaving this one down to the wire. After reading a post on Well Preserved I was reminded of a great resource for finding interesting and new flavor combinations. The Flavor Bible has been on my shelf for months and I never thought of using it for coming up with flavor pairings that would work in a Jam. I had intended on making a plum jam because we had such a variety of different plums and there were more than we could eat. Flipping over to the Plum section of the book, the very first listing that jumped out at me was Bay Leaf and Vanilla. I had to try it. I love sweet and savory combinations and this one sounded like a winner, especially since we were going to use our own homemade vanilla extract (Beans + Vodka + Time = tasty goodness).

I have to say that I loved how this turned out. It's very sweet but the bay just gives it hint of something herbal and it really works. I think if I would change anything next time I would lessen the sugar and add a few extra bay leaves.

Plum Jam with Bay & Vanilla
(adapted from Whole Living)

Ingredients:
3 pounds plums, pitted and quartered
3 cups of sugar
1 tablespoon lemon juice
1/4 teaspoon salt
1 tablespoon of vanilla
2 bay leaves

This recipe yielded 5 - 250ml Jars

1 - Combine plums, sugar, lemon juice, salt, vanilla and bay leaves in a pot over high heat. Bring to a boil, mashing with a potato masher and skim off any scum from the top.

2 - Boil and stir frequently, until the bubbles slow down. Place some small plates in the freezer and use them to test if your jam has set.

3 - Prepare jars and lids, ladle jam into hot jars leaving 1/2 inch of head space and remove any air bubbles. Hot water process jars for 10 minutes.

Thursday, August 19, 2010

Chipotle Barbecue Sauce

Chipotle Barbecue Sauce

Lucky for me this months Can Jam theme ingredient was ready very early here in Toronto. Our growing season has been so warm that every crop has been popping up at our markets at least 2 weeks earlier than normal. We have loads of plans for tomatoes in the coming weeks. We have a tomato conserva recipe that I really want to try from Paul Bertoli's Cooking by Hand. A ketchup is also something that would be great to try out (replace and skip the Heinz for good!). There is the now annual jars and jars of sauce (second year in a row makes it annual now!)

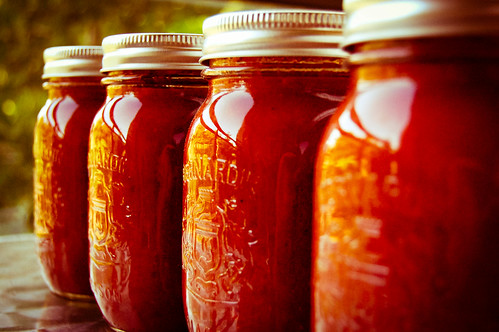
So far I've made some mustard and relish and for the last few of our summer cookouts we needed some good old Barbecue sauce. I wanted to start with very basic recipe for our first canned barbecue sauce. The only thing I couldn't resist was adding some more heat. The recipe called for some chili flakes but that wasn't nearly enough so I added some chipotles in adobo. I love the sweet and smokey heat they add to anything and figured it was the perfect addition to give this basic sauce a bit more of a boost.

Chipotle Barbecue Sauce Chipotle Barbecue Sauce

Chipotle Barbecue Sauce
(adapted from the Bernardin Complete Book of Home Preserving)

Ingredients:
20 cups of chopped tomatoes
2 cups of chopped onions
1/4 cup chipotle chiles in adobo
3 cloves of finely chopped garlic
1 tbsp of hot pepper flakes
1 tbsp of celery seeds
1 1/2 cups of lightly packed brown sugar
1 cup of white vinegar
1/3 cup of lemon juice
2 tbsp of salt
1 tbsp of ground mace
1 tbsp of dry mustard
1 tsp of ground ginger
1 tsp of ground cinnamon

This recipe yielded 4 - 500ml Jars

1 - In a stainless steel pot, combine tomatoes, onions, chipotles, garlic, hot pepper flakes and celery seeds. Bring to a boil over high heat, stirring constantly. Reduce heat, cover and boil gently until everything softens, about 30 minutes.

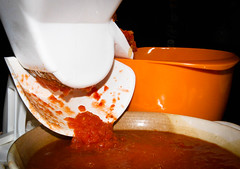
2 - Pass the the mixture through a food mill. Keep passing the seeds and skins through the mill until they are dry and all the pulp has been extracted.

3 - Return the mixture to the pot and boil, stirring occasionally, until cooked down by one quarter. Add brown sugar, vinegar, lemon juice, salt, mace, mustard, ginger and cinnamon. Return to a boil over medium-high heat, stirring occasionally. Reduce heat and boil gently, stirring frequently, until mixture is thickened, about 30-40 mins.

4 - Prepare jars and lids, ladle sauce into hot jars leaving 1/2 inch of head space and remove any air bubbles. Hot water process jars for 20 minutes.

Thursday, July 22, 2010

Zuchinni Garden Pepper Relish

Zucchini Garden Pepper Relish

I knew exactly what I was going to make when zucchini season came around. A few years back a friend was gifted a few jars preserves and one of them was a zucchini relish. I've never been a fan of the nasty green stuff served at a BBQs, but this zucchini relish was nothing like that and I loved it. I really wanted to make my own batch and since this month's Can Jam theme was "cucurbits", the timing was right.

My wife joined me, helping out with all the prep work. Everything was ready to go in the pot, and as soon as all the ingredients started to warm up on the stove, my wife commented on how great everything smelled. She kept saying how much it reminded her of something, and how familiar it was. With a light bulb moment she ran over to her mother's recipe box that is crammed with old recipes for family favourites and newspaper clippings from years ago. She shuffled through the cards and found a section with all of her mother's preserves, and plucked out a card with recipe for "Mild Mustard Pickle Relish".

The card itself had a history of its own, a bit dog eared, a bit of food spatters and some scribbled notes in the corners. Now what I found amazing about all this, was how the smell triggered such a vivid memory for my wife. The scene was painted lovingly of her mother making this relish while she helped as a young girl. I loved how all of this was preserved. How a simple act of cooking brought out a far memory. It was pin pointed to that recipe card in a matter of seconds.

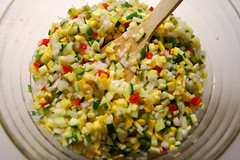
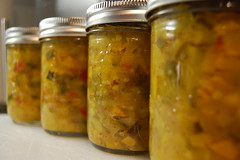
The recipe I chose seems to be pretty generic as a few of my books' versions were very similar. I wanted to add a dimension of heat so I added some Jalapeno peppers and some ancho chile powder. We tried this one immediately and loved it. It was fabulous with some pork chops we had that evening. I'm sure it will be fantastic at a family BBQ in few weeks were we can enjoy and recall the fond memories it stirred up of my wife's Mom.

Zucchini Garden Pepper Relish Zucchini Garden Pepper Relish Zucchini Garden Pepper Relish

Zucchini Garden Pepper Relish
(adapted from the Complete Book of Small-Batch Preserving)

Ingredients:
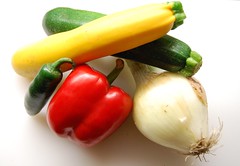
4 Medium Zucchini finely chopped (about 1 1/4lbs)
2 Medium Onions finely chopped
1/2 Sweet Red Pepper finely chopped
1/2 Sweet Green Pepper finely chopped
2 Jalapeno Peppers finely chopped (optional)
2 tbsp Pickling Salt
1 1/4 cups Granulated Sugar
3/4 cup Cider Vinegar
1 tsp Dry Mustard
1 tsp Celery Seeds
1 tsp Ancho Chile Powder (optional)
1/2 tsp Tumeric
2 tsp Cornstarch

This recipe yielded 4 - 500ml Jars

1 - Toss together zucchini, onions and peppers in a large non-reactive bowl. Sprinkle with the salt and stir well. Let stand for 1 hour, stirring occasionally.

2 - Drain vegetables in a sieve and rinse, then drain again, pressing out excess moisture.

3 - Combine drained vegetables, sugar, vinegar, mustard, celery seeds, ancho chile powder and tumeric in a large stainless steel or enamel saucepan. Bring to a boil over high heat, reduce the heat and continue boiling gently, uncovered for 15 minutes or until vegetables are tender.

4 - Blend water and cornstarch, stir into vegetables. Cook for 5 minutes or until the liquid thickens, stirring often.

5 - Remove hot jars from canner and ladle relish into jars to within 1/2 inch of the rim. Process jars for 10 mins.

Friday, June 25, 2010

Cerejas com Aguardente

Cerejas com Aguardente

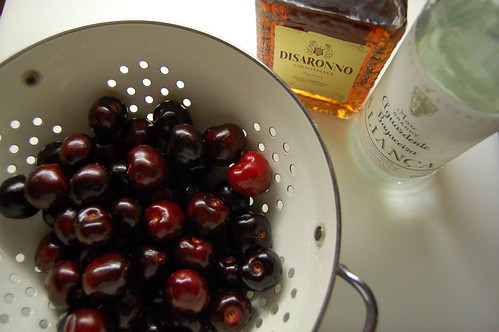
With the World Cup on and my team about the hit the pitch against Brazil in a few minutes I wanted to give this month's preserves a little Portuguese nod. I wanted to make something that we could use as a dessert topping and in a cocktail. As the summer heats up I will be pulling out our Ice Cream maker and one of these will be the final topping on a tasty homemade sundae. I'm also really looking forward to using one of these in a Manhattan instead of one of those nasty nuclear red jarred supermarket Maraschino cherries.

Where I adapted this recipe was in the alcohol I used. Aguardente is popular Portuguese brandy that is made by using the spent grape must after wine making, very similar to an Italian grappa. I also added a touch of Amaretto to add an hint of almond flavor.

Cerejas com Aguardente
(adapted from the Bernardin Complete Book of Home Preserving)

Ingredients:
approx 4 cups of Cherries
2 cups of Water
1 cup of Sugar
1 tbsp of Aguardente
1 tsp of Amaretto

This recipe yielded 2 - 500ml Jars

1 - In a saucepan, over medium heat combine sugar and water. Bring to a boil, stirring to dissolve sugar. Add the cherries, stirring constantly, and return to a boil. Reduce heat and boil gently for 5 minutes.

2 - Using a slotted spoon, pack cherries into prepared hot jars to within about 1/2" of top of jar and add the Aguardente and Amaretto. Ladle hot syrup into the jars to cover the cherries leaving 1/2" of headspace. Remove any air bubbles, adding more syrup if needed. Seal with prepared lids and hot water process for 15 minutes.

Thursday, May 20, 2010

Pickled Asparagus


I think this month there will be lots and lots of pickled asparagus. I knew the minute that this months theme was announced that it was my first choice. The other ingredient that shared this months theme spotlight was rhubarb, and I am not a fan. I've never enjoyed it, last year's strawberry/rhubarb jam and rhubarb chutney sit ignored on our storage shelf and I always side step them for other favorite preserves.

I've read about using the asparagus as garnish in a Ceaser... mmm that sounded tasty, so here is the recipe that I used, not much was adapted although there was an error in my printed copy as the sugar was missing from the ingredient list. I made one jar with the chili and 2 without so I had a variation. Can't wait to try these in a few weeks.

Pickled Asparagus
(adapted from Well Preserved by Mary Anne Dragen)

Ingredients:
approx 5lbs of Asparagus
4 cups of Water
4 cups of White Vinegar
1 large Onion peeled, halved and sliced in 1/4" slices
6 cloves of Garlic
3 tbsp of Pickling Salt
3 tbsp of Sugar
3 tbsp of Mustard Seeds
2 tbsp of Dill Seeds
Chili Peppers (optional - I used 2 small Serrano's in 1 jar)

This recipe yielded 3 - 1L Jars

1 -Trim Asparagus spears to jar length - I used a great tip from Well Preserved here! They should stand at least 1" shorter than the rim of the jar.

2 - Perpare your canning jars and lids

3 - Combine water and vinegar in a pot and bring to a boil. Reduce the heat and keep the mixture at a simmer.

4 - Working with 1 jar at a time, place a third of the onion slices, 2 cloves of garlic, a chili pepper if using, 1 tablespoon each of sugar, salt, mustard seeds and 2 teaspoons of dill seed. Pack the asparagus in each jar tips down. It helps to lay the jar on it's side - I really wish I had used a wide mouth jar for these. It would have prevented damage to the spears and made loading the jars much easier! Pack them in tight.

5 - Pour hot vinegar liquid into the jars leaving 1/4" headroom and seal with prepared lids. Hot water process jars for 20 minutes.