Thursday, May 20, 2010

Pickled Asparagus


I think this month there will be lots and lots of pickled asparagus. I knew the minute that this months theme was announced that it was my first choice. The other ingredient that shared this months theme spotlight was rhubarb, and I am not a fan. I've never enjoyed it, last year's strawberry/rhubarb jam and rhubarb chutney sit ignored on our storage shelf and I always side step them for other favorite preserves.

I've read about using the asparagus as garnish in a Ceaser... mmm that sounded tasty, so here is the recipe that I used, not much was adapted although there was an error in my printed copy as the sugar was missing from the ingredient list. I made one jar with the chili and 2 without so I had a variation. Can't wait to try these in a few weeks.

Pickled Asparagus
(adapted from Well Preserved by Mary Anne Dragen)

Ingredients:
approx 5lbs of Asparagus
4 cups of Water
4 cups of White Vinegar
1 large Onion peeled, halved and sliced in 1/4" slices
6 cloves of Garlic
3 tbsp of Pickling Salt
3 tbsp of Sugar
3 tbsp of Mustard Seeds
2 tbsp of Dill Seeds
Chili Peppers (optional - I used 2 small Serrano's in 1 jar)

This recipe yielded 3 - 1L Jars

1 -Trim Asparagus spears to jar length - I used a great tip from Well Preserved here! They should stand at least 1" shorter than the rim of the jar.

2 - Perpare your canning jars and lids

3 - Combine water and vinegar in a pot and bring to a boil. Reduce the heat and keep the mixture at a simmer.

4 - Working with 1 jar at a time, place a third of the onion slices, 2 cloves of garlic, a chili pepper if using, 1 tablespoon each of sugar, salt, mustard seeds and 2 teaspoons of dill seed. Pack the asparagus in each jar tips down. It helps to lay the jar on it's side - I really wish I had used a wide mouth jar for these. It would have prevented damage to the spears and made loading the jars much easier! Pack them in tight.

5 - Pour hot vinegar liquid into the jars leaving 1/4" headroom and seal with prepared lids. Hot water process jars for 20 minutes.

Saturday, April 24, 2010

Lemon Sage & White Wine Mustard

Lemon Sage & White Wine Mustard

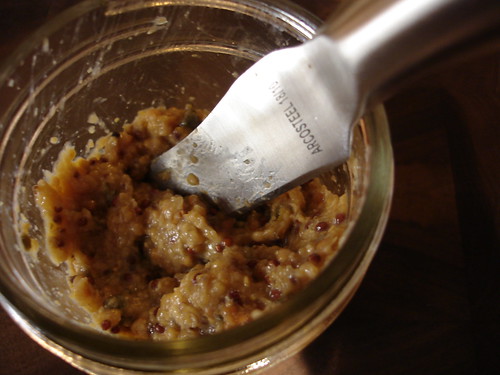
I wasn't sure what I could make for this months Can-Jam Herb theme, I was a little stumped. The only thing that kept coming to mind was mint jelly... and I'm not exactly a fan. So I remembered a post from last months Allium Can-Jam for a Garlic & Lemon mustard.. I loooove mustard, and have quite a few different jars on the go at one time, but I have never tried making my own, until now.

After flipping through my books I landed on a recipe that sounded like it would be a winner, Lemon, Sage and white wine. The only adaptation I made was replacing a 1/4 cup of the yellow mustard seeds with brown, simple reason... I was short on yellow mustard seeds and had a bunch of brown seeds on hand.

Lemon Sage & White Wine Mustard
(adapted from The Complete Book of Home Preserving)

Ingredients:
1 bunch of fresh sage
3/4 cup of Dry White Wine (I used a Chardonnay)
1/2 cup of Yellow Mustard Seeds
1/2 cup of Brown Mustard Seeds
1 cup of White Wine Vinegar (must have at least 5% acidity)
Grated Zest & Juice of 2 Large Lemons
1/2 cup of Honey
1/4 tsp Salt

This recipe yielded 5 - 125ml Jars

1 - Finely chop enough sage leaves to measure 1/3 of a cup and set aside.

2 - Coarsely chop remaining sage leaves and stems to measure 1/2 cup and place in a stainless steel saucepan with the wine. Bring to a boil over medium heat, stirring and pressing the leaves to release their flavours. Remove from heat, cover and let it steep for 5 minutes.

3 - Transfer sage infusion to sieve placed over a glass or stainless steel bowl and press the leaves with the back of a spoon to extract all the liquid. Discard the solids and return the liquid to the saucepan. Add the mustard seeds . Cover and let them stand at room temperature until the seeds have absorbed most of the liquid, about 2 hours.

4 - Prepare canner, jars and lids.

5 - In a blender (or food processor fitted with a metal blade), combine the marinated seeds and liquid with vinegar. Process until blended and most seeds are well chopped, I kept a slightly grainy texture.

6 - Transfer mixture back to the saucepan and add lemon zest, lemon juice, honey, salt and reserved chopped sage. Bring to a boil over high head, stirring constantly. Reduce heat to low and boil gently, stirring frequently, until volume has reduced by a third, about 20 minutes.

7 - Ladle hot mustard into hot jars, leaving 1/4 inch of headspace. Process jars for 10 minutes.

Monday, March 15, 2010

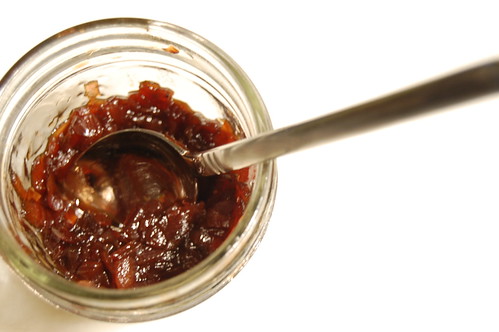
Carmelized Red Onion Relish

DSC_0118

This month started with another low acid warning! Much like the warning we received for last months theme, the carrot, we were given another ingredient to can that was low on the acid meter, the Allium family. I chose to adapt another recipe from a published source to make sure that I was keeping the acidity at a proper level.

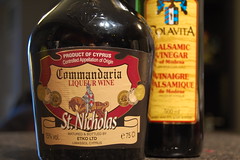
My first thought was some sort of Balsamic Onion Confit. I sampled one a while back that was an excellent pairing with a foie gras tourchon and loved its sweet and sour tang. I hit the few books I had and found a quick and small batch recipe for a Caramalized Red Onion Relish. The ingredient list was short and to the point and looked to contain everything I needed to make something that resembled that confit. I changed up the basic red wine called for in the recipe for some Commandaria, a desert wine from Cyprus that is similar to a Tawny Port. I figured it would give the balsamic a boost and add another dimension to the flavour.

I'm really happy with the end result. A soon as I sampled a taste I immediately thought of running out to get some crusty bread and some sharp aged cheddar for my take on a ploughman's lunch.

DSC_0126 DSC_0102

Carmelized Red Onion Relish with Commandaria
(adapted from The Complete Book of Small-Batch Preserving by Ellie Topp and Margaret Howard)

2 large red onions, peeled and chopped
1/4 cup firmly packed brown sugar
1 cup of Commandaria Wine (or dry red wine)
1/4 cup of balsamic vinegar
1/8 tsp each of salt and freshly ground pepper

This recipe yielded 4 - 250ml Jars 

Combine onions and brown sugar in a heavy non-stick skillet. Cook uncovered over medium-high heat for 25 minutes or until onions turn golden and start to caramelize, stirring frequently.

Stir in wine and vinegar. Bring to a boil over high heat, reduce heat to low and cook for about 15 minutes or until most of the liquid evaporated, stirring frequently.

Season to taste with salt and pepper.

Remove hot jars from canner and spoon relish into jars to within 1/2 inch of rim and process for 10 minutes.

Thursday, February 18, 2010

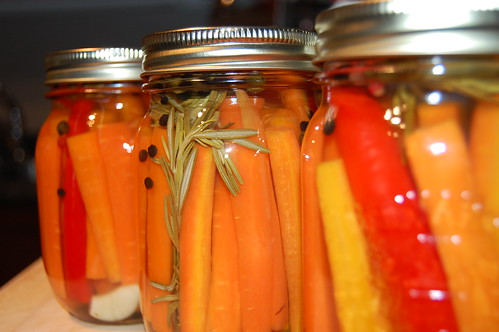
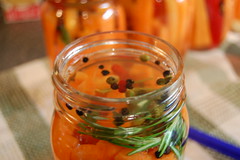
Pickled Rosemary Carrots

DSC_0019

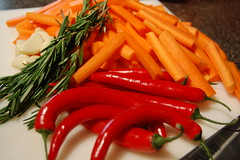
With all the warnings on the low acidity scariness that is the carrot this month, I decided to not stray too far from a published recipe found in Well Preserved by Mary Anne Dragen. I really wanted to have something on hand that would be a good accompaniment to have with some charcuterie. Haven't been able to try them yet, but I hope to report back good results in a few weeks.

DSC_1218 DSC_0001

Pickled Rosemary Carrots
(adapted from Well Preserved by Mary Anne Dragen)

Ingredients:
3 Cups of Water
3 Cups of White Wine Vinegar (must have at least 5% acidity)
1/4 Cup of Sugar
1/4 Cup of Pickling Salt
2 Tablespoons of Mixed Peppercorns
6 Cloves of Garlic
6 Hot Red Chili Peppers
4lb of Carrots - cut into sticks about 4 inches long
6 Sprigs of Rosemary

This recipe yielded 5 - 500ml Jars

Combine the water, vinegar, sugar, salt, and peppercorns and bring to a boil and simmer for 5 mins.

Take 1 hot sterilized jar at a time, add 1 garlic clove, 1 chili and 1 sprig of rosemary. Pack the carrot sticks tightly into the jars standing them upright. Pour the liquid in the jars and leave a 1/4" of head space and hot water process for 15mins.

Friday, January 22, 2010

Seville Orange Marmalade

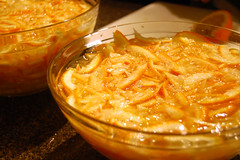
Seville Orange Marmalade

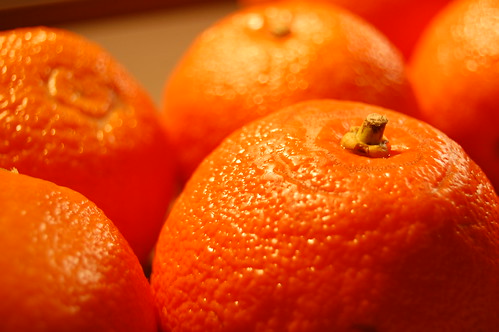
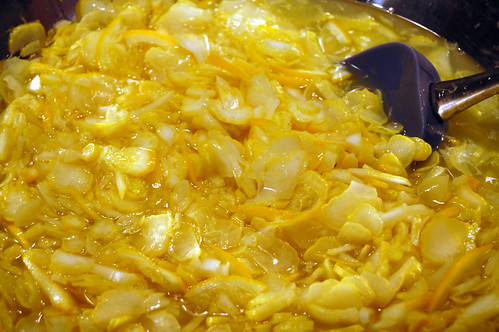
My first attempt at marmalade was using a very non-traditional citrus ingredient, the Buddha's Hand Citron. But I still wanted to try making marmalade with the traditional Seville orange. Seville's have just recently started appearing at shops here in Toronto so I loaded up on and started out with trying 2 different recipes.

The first recipe I used was from a recent episode of Good Eats. I've always liked Alton Brown's show for his mix of science and cookery. For a contrast I used a recipe that an old neighbor of mine was glad to share. As a columnist at the Toronto Star he would publish his wife's recipe annually when Seville orange season rolled around.

What I wanted to see by trying out the 2 was how different would they be? Alton Brown's recipe can be made in a day, Ayesha's took 3...  Would Alton's scientific approach trump Ayesha's tried and true, year in year out version? Alton's was tasty, but I really did prefer Ayesha's in the end. I followed both to the letter but the texture of the peel in Alton's was still a bit to hard and bitter, I think it could have used a longer boil to soften it, or was it the lack of soaking time that Ayesha included in her process?

Seville Orange Marmalade

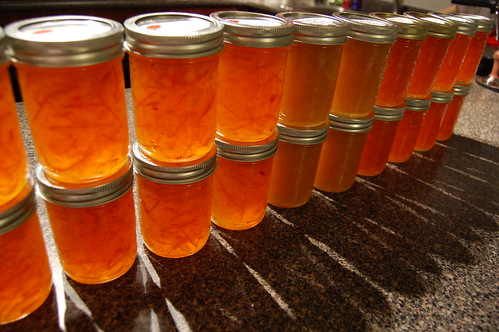
So now after all that Marmalade making I have over 20 jars completed. Looking at all the fantastic ideas that have started rolling in for the Tigress Can Jam, I'm now inspired to try something outside the marmalade realm. When I do decide to make seville orange marmalade again I will be going with Ayesha's recipe. Below is her recipe as it was given to me.

Ayesha's Seville Orange Marmalade

Ingredients:
8 Seville Oranges
8-12 cups of water (I used 10 cups)
6 cups of sugar

This recipe yeilded 8 - 250ml Jars

Look for fruit with soft, shiny skin, never mind the warts. Eight oranges will do first time out. Wash and dry the fruit.

Seville Orange Marmalade Seville Orange Marmalade

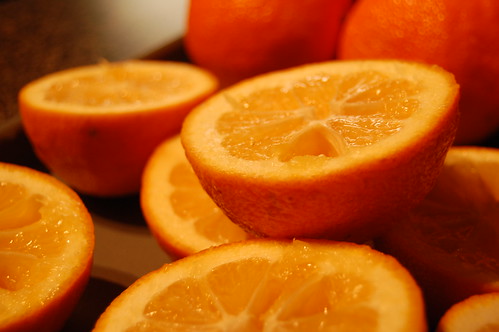
With a sharp knife, slice the whole oranges as finely as you can - skin, pith and pulp. But be careful not to cut the seeds or let them dry out - they contain the pectin and you'll need them.

You can either leave the seeds with the mixture to boil, skimming them off just before you bottle the marmalade, or put them in a cheesecloth bag, leaving them to boil until you remove them again just before bottling.

Put the sliced oranges into a large bowl, earthenware if possible, and for every orange you started with, add a cup or a cup-and-a-half of water, depending on how thick you want the marmalade to be. Cover the bowl with a cloth (not plastic wrap) and keep it for two or three days at room temperature, stirring occasionally.

Now the first boil: with a lid on, simmer the fruit in a large pan for an hour or two - until the peel feels soft when you squeeze it between your fingers (don't burn yourself!). Pour the fruit back into the large bowl to cool.

The secret of the second boil is not to do it all at once. Measure four cups of the fruit into the pan with three cups of sugar and boil rapidly for 15 or 20 minutes. When it starts to thicken, put a small amount in a dessert or tablespoon and put it in the fridge. If, after a few minutes, you detect a skin on the surface, it's ready.

Take the pan off the stove and let it cool for five minutes (while you remove the seeds) before putting the marmalade into sterilized jars and hot water process.

Seville Orange Marmalade

Tuesday, January 19, 2010

Buddha's Hand Marmalade


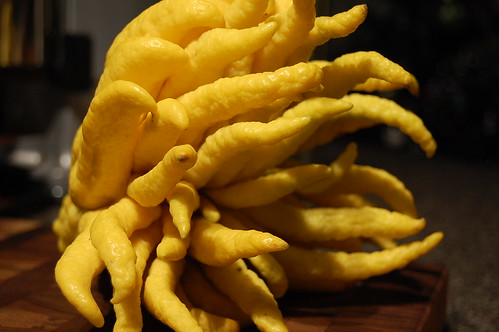
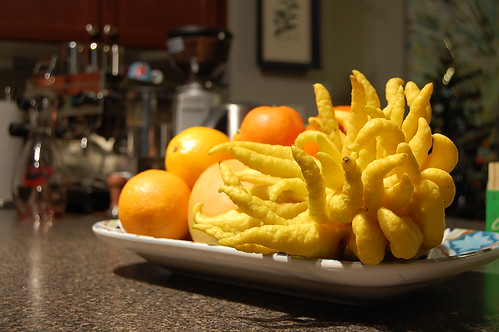
When I walked into Whole Foods to see what kind of Citrus they had on hand I spotted a basket of Buddha's Hand Citrons. I have been intrigued by this fruit after seeing it used in an episode of Iron Chef and it was once featured in an issue of Cooks Illustrated. I just had to have it, but what the hell was I going to do with it? It smelled amazing! The peel was so fragrant and it perfumed my entire kitchen. I had to figure out a way to use it for the Can Jam.

I searched through all my books and nada.. Lots of other citrus recipes but nothing for the oddball Citron. Off to google I went and I found 1 recipe from a blog - Dan's Kitchen. I started with this as my base and varied slightly from there. In the linked recipe he mentions to use the only peel but I thought that it would waste too much of the fruit. In Harold McGee's book, On Food and Cooking, he mentions that most of the pectin is contained in the pith. I had a taste of the Buddha's Hand and it wasn't very bitter, so I decided to keep much of the pith from the fruit's fingers. I had 2 meyer lemons on hand that I added to mix. This added some moisture since the Buddha's hand lacked any pulp. I wasn't sure how the Amaretto would work here but I liked the idea of adding an almondy element, so I went with it.


I was very happy with the end result; this was my first attempt at any marmalade. The marmalade managed to keep the distinct fragrance that I loved about the fruit.

This recipe yielded almost 5 - 250ml Jars

Ingredients:
1 Buddha's Hand Citron
2 Meyer Lemons
5 cups of water
3 cups of white sugar
2 tablespoons Lemon Juice
3 tablespoons Amaretto liquor (optional)

Instructions:
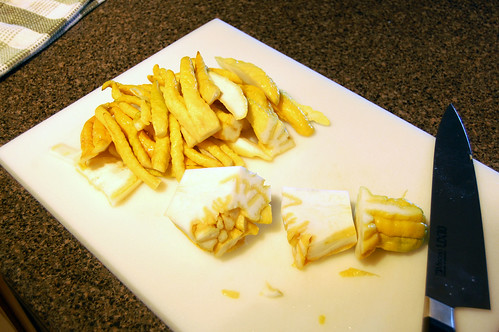
Break down the Buddha's Hand by cutting each "finger" and cut away peel from the base. Thinly slice the Buddha's Hand and Meyer lemons. Reserve the seeds from the Meyer lemons (the Buddha's hand had no seeds) wrap them in cheesecloth.  Place everything into a bowl and cover with the water to sit for about an hour.


Transfer the contents of the bowl into a pot and bring to a gentle boil for about 30-45 minutes. At this point remove the cheesecloth, let it cool and squeeze out any remaining liquid back into the pot. Add the sugar and Amaretto and stir until completely dissolved. Let the mixture come back to a gentle boil for 45-60 minutes until it reaches 217-220°C on a candy thermometer or do a set test on a small plate in the freezer. Stir in the lemon juice about 10 minutes before the cooking is complete.

Prepare your jars and lids for canning, I filled 5, 250ml jars with 1/2" of head space and hot water processed them for 10 minutes. Great instructions over at Tigress in a Jam on hot water bath canning.


Thursday, January 7, 2010

What can I can for the Can Jam?


Last summer I was very intrigued by the prospect of making my own Jam and Pickles. I had never made my own, but I have many fond memories of my mother making preserves from her over abundant garden. Growing up we had great blackberry jams and canned peaches that barely lasted the winter because they were so good.

Our first attempt started with a basic strawberry jam that involved the use of pectin, not something that my mother ever used but it was the first recipe we had. I wanted to find ways of not using additives to set the jam. Through a few google searches I came across Wellpreserved.ca and and I started to read the daily entries. And they lead me to Tigress in a Jam where I came across the project that I and about 134 others will be partaking in, once a month for rest of this year. You can read about it further by following the link in the sidebar button for Tigress' Can Jam.

The theme for January is Citrus, and what will I be making? I'm not sure... I went to the market and I came back with the above haul, I wanted to taste 1 of each of the citrus they had in at the time. Cara Cara, Blood, Navel, Kumquats, Grapefruit, Clementine, Sunburst Tangerine, Satsuma Mandarin, Meyer Lemon, Minneola and my favorite odd ball of the bunch the Buddha's Hand Citron. I've also been flipping through my canning books trying to narrow down what I want to make and I keep coming back to one thing, a Traditional Marmalade. Figures that the one citrus fruit that wasn't at the shop or in season yet is a Seville Orange. I am going to have a fun time eating and using the various citrus that are stacked up in that bowl. Who knows...I may end up with a 12 citrus varietal blend of Marmalade!